Rhythm was my weak point as a student, so as a teacher I am always looking for quick and easy music rhythm games to help my students get a better understanding of timing.
All you need for our 3 easy music rhythm game ideas today is a set of rhythm flashcards.
Then, you can keep these ideas in your back pocket to pull out in just seconds anytime your students need a little extra rhythm help.
Now, for our 3 quick and easy music rhythm games!
1. Rhythm Slap Jack
Who didn’t love Slap Jack as a kid? It is a very easy game for children of all ages to play, and you can make it into an easy music rhythm game by using rhythm flashcards.
Play with the whole deck of rhythm flashcards BUT assign 1 special card to be “Jack” (the card you slap)
You might start with the whole note (semibreve) as “Jack.” Every time a whole note is laid, the players race to slap it. Then, change it to the dotted half note (dotted minim), where players slap only the dotted half note.
You can work your way through ALL the different notes to help your students learn the names of all of the notes.
Bonus: remember, you can also slap doubles for extra cards!
2. Note Slap
What can I say? I like slapping games.
Here are the instructions to use this game with Rhythm Reef, but you can also play it without a gameboard.
Lay four cards face-up so students can see notes and rests.
Say one note or rest (e.g. eighth note/quaver)
The student to slap the correct card first gets to keep the card.
When a student has collected 3 cards, they get to move forward on the Rhythm Reef board and the cards get reshuffled and you start over.
First player to “Finish” wins.
You can also adapt this game to be played with beats instead of note values (e.g. “one beat” or “one beat of silence” instead of “quarter note/crotchet”)
3. Rhythm Speed
If you want to help your students gain speed with note recognition, then this is the game for you!
Flip up a card, if the student identifies it correctly, then flip up another.
Give the student 3 seconds to answer correctly before their turn is forfeited so they don’t take forever.
Keep going until the student either runs out of time or says a note incorrectly.
Then it’s the next student’s turn.
The student with the most cards at the end wins.
You can also adapt this game for students to review note rhythm names and then how many beats each note gets.
Bonus Easy Rhythm Games: Rhythm Reef!
I have mentioned Rhythm Reef a few times in this blog post already.
Rhythm is tricky and it seems like students need constant review.
Well, Music Game Club’s May 2024 game of the month is a fast-paced and FUN rhythm game that will get your students learning note values quickly (especially rest values!).
Based on my childhood favorite game, Egyptian War (also called Egyptian Rat Screw, Slap, Snot, or War), Rhythm Reef focuses on rest values and agility.
You can play it with 2-8 players in just one round or several rounds with the gameboard.
Here is the gist of Rhythm Reef easy music rhythm game:
Deal the cards evenly between all players
Discard in the center like “Slap Jack”
When a rest card is discarded, the next player has to “pay” as many cards as the rest is worth (e.g. a whole rest = 4 cards, half rest = 2 cards)
You can slap doubles!
Whoever ends up with all the cards at the end wins!
After a few years of teaching, you might start looking for ideas to use music note flashcards for more than note drills.
While note drills have their place (and I have done many 1-minute challenges in my studio!), there are so many fun things you can do with one-note music note flashcards.
Here are four fun ideas to shake up your music note flashcards in the studio!
1. Teach Lines & Spaces with Music Note Flashcards
Let’s start with your beginning students.
It’s tempting to wait and use music note flashcards for when students know their note names, but you can use them way before then!
Start by introducing your students to lines and spaces.
Here are 2 fun games to teach lines & spaces with music note flashcards
First, be sure to only use notes that are on the lines and spaces (e.g. no Middle C).
It’s war! Give each student a die. Flip up a card and students race to roll the correct number on the die (e.g. Line 1 = 1; Space 3 = 3). The first student with the correct number collects the card. Student with the most cards at the end wins.
Each student has a die. The cards are at the center. Each student picks a card and has to roll their die to match the number. As soon as they do, they can pick another card from the center. Student with the most cards at the end wins.
2. Use Music Note Flashcards for Sight Reading
This is going beyond note drills with flashcards.
Bring the music note flashcards to the piano and have students actually read the cards they’re reviewing.
Here are four sight-reading ideas you can use:
Lay out 5 cards. Teacher says a note name (“treble clef G”) and the student has to find it. If you’re playing in a group, the first student to slap the correct note gets to keep the card. The student with the most cards at the end wins.
Lay 3 cards on the piano and play 1 of them. The student has to identify the exact note played (this is a great idea for having all 3 Cs on the piano and they have to decide if you played low, middle, or high).
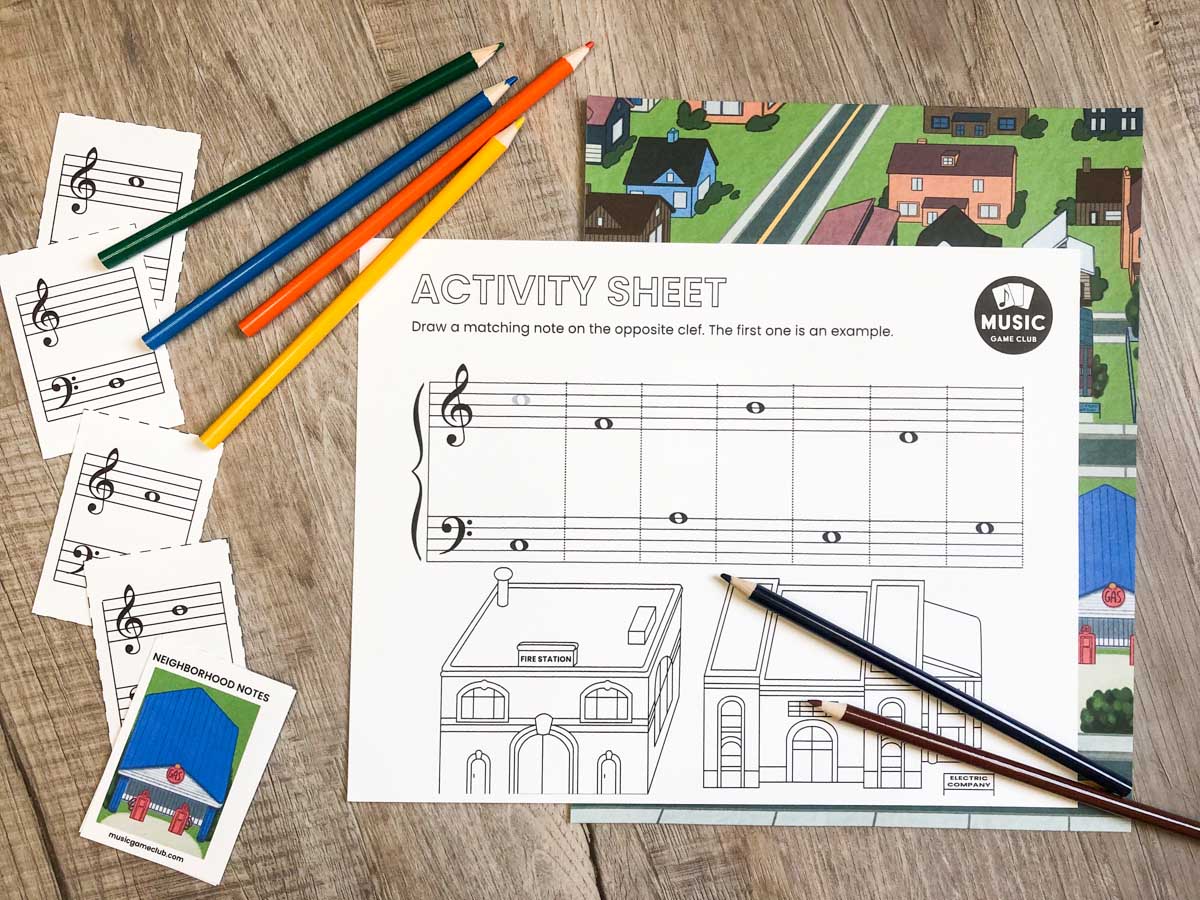
Lay 5 cards on the keyboard and have the student sightread through them. For fun, put the Neighborhood Notes buildings in a cup and have them draw 1 building when they’ve correctly sight-read 5 notes. After 3 rounds, how many points do they have?
For a group: show students 1 card. They must race to play the exact pitch on the piano!
3. Ear Training with Music Note Flashcards
While our students need a lot of help with recognizing notes on the staff, it’s also important to train their ear (in my opinion, ear training helps sight reading!).
Here are 3 easy ways you can use music note flashcards for ear training.
Line up 3 cards on the piano (I’d just do 1 clef). Play the C scale and then play 1 of the cards you have flipped up. The student has to guess which note it is without looking.
Flip 3 cards up (both clefs). Play all 3 notes while the student calls out their name. Ask the student to turn around. Play just 1 of the notes. What note is it? (to make this easier, do notes that are really spread apart)
Line up all 8 cards for the C scale. Play the scale then play just 1 note. The student has to guess which note it is. For added fun, have the student collect Neighborhood Notes buildings when they guess a note correctly (A = Academy, etc.)
4. Play Neighborhood Notes!
You may have been wondering what Neighborhood Notes is that I’ve been mentioning.
Well, it’s our newest music notes flashcard game!
Neighborhood Notes takes a twist on the card game “Spoons” and is a speed note reading game.
You can play it with 2-8 players and keep track of points (which are tricky–there are some negative points on the board!)
Watch how to play it in our tutorial video.
Here’s what you’ll get with the Neighborhood Notes printable download:
Neighborhood Notes game in 2 sizes: US letter & A4
Neighborhood Notes game board (bonus: in poster and A3 sizes)
32 note cards (C3-C5)
7 building game pieces
Neighborhood Notes success poster
Neighborhood Notes activity sheets in 2 sizes: US Letter & A4
Print release
Bonus: Note Chart
Neighborhood Notes was our April 2024 Music Game Club membership game.
But there’s more!
Digital Music Note Flashcards
If your students always forget to review printed music note flashcards, then it’s time to try digital games!
Comment and share YOUR best tips, games, or even just fun memories about using music note flashcards in your studio! We love hearing from other teachers!
If you’ve not played rhythm flashcard games in your piano studio, then you are missing out!
One of the top struggles most music students have is rhythm.
And one of the first steps is to help students thoroughly understand the beats of every single note–plus giving them a randomized rhythm exercise to do.
Making rhythm exercises a game is one easy way to get students to understand and appreciate rhythm.
We’ve compiled a list of 10 rhythm flashcard games your students will love.
While you can use these with any rhythm cards, we are using the cards from Music Game Club’s Beginner Rhythm Flashcards.
1. Beats in order
One of the easiest rhythm flashcard games is timing how quickly a student can order the beats.
You can go from least-to-greatest beats or greatest-to-least.
2. Match notes & rests
Sometimes, students get very confused about rests.
So doing a rhythm flashcard game where students match notes and rests will help clarify any confusion.
You can play this like normal “memory match” games where the cards are laid out and students flip over two at a time until they get a match (e.g. quarter note and quarter rest).
Or, you can have the student flip up the cards and lay them face-up, pairing matches as soon as they flip up the pair (e.g. student may flip up an eighth note, half note, and whole note before getting the eighth rest to match on top of the eighth note).
3. Claim the beat
Lay all of the rhythm flashcards out face-up.
Teacher says “1” and the student grabs a card with the correct value (in this case, a quarter note or rest).
Continue saying other numbers until all the cards are gone.
You can time it to see how quickly the student can find all the right notes.
4. Rhythm Four Corners!
Label the four corners of your room 1-4 (you can either label them random with 1 = whole note, 2 = eighth note; or you can be mathematical about it and 1 = quarter note, 2 = half note, 3 = dotted half note, 4 = whole note).
Teacher holds up a note or rest and students rush to that corner.
5. Rhythm War
Play “war” with rhythm flashcards!
Split the rhythm flashcards into two piles; teacher gets one, student gets one.
Teacher and student flip up a card.
Whoever has the highest note value “wins” that round and collects all cards.
If there is a tie (same note or value), flip up another card and the winner of that round wins all cards on the table.
You can also swap this one around and the lowest value wins.
6. Rhythm dictation
Clap a rhythm.
Have the students rush to lay our rhythm flashcards and finish first.
For an extra fun flair, have a bell that the student can ring when they are done!
Keep points to see who can lay out the most rhythms if you need a little competition.
7. Familiar Song Rhythm
Play a portion of a melody that your student is learning or a familiar tune.
Student creates the rhythm with flashcards.
You can play this like #6 (Rhythm Dictation) if you have multiple students; they can race to finish first, ring a bell, and keep score.
8. Guess the Rhythm
Lay out two rhythms.
Clap or play one of them.
Have the student identify which rhythm they heard clapped or played.
9. Clap Back
Lay out a rhythm and have the student clap it back to you.
To make a game of it, assign points if the student claps it perfectly, deduct points if the student holds a note too long or short, etc.
10. Rhythm improvisation
Work with the student to create a rhythm.
Clap and count the rhythm then go to the piano (or another fun instrument) and create an improvisation based on the rhythm.
If your student freezes at the thought of improv, then add some note flashcards to the mix and assign a note flashcard for each rhythm flashcard (it doesn’t have to be set in stone; if the student thinks one of the notes sounds funny, you can go from there to change it and come up with a melody the student loves).
11. Bonus! Four-Four Foxes!
In addition to these 10 rhythm flashcard games students love, here’s one you’ll want to add to your studio!
Last summer, we released a Candyland type of game for note reading, and it quickly became a teacher and student favorite (Keyboard Kittens).
So we decided to create another Candyland game, this time focusing on rhythm.
Use Four-Four Foxes for new beginners
We wanted a rhythm-focus for this game, specifically for teaching young beginners what all the notes are called and how many beats they get.
The cards include eighth notes & rests, quarter notes & rests, dotted quarter notes, half notes & rests, dotted half notes, whole notes & rests, and a few specialty cards.
Even your youngest beginners can play this game!
Use Four-Four Foxes for intermediate students
Of course, we realize you need games for more than just very beginning students, so we brainstormed a gameplay variation for your more intermediate students.
The easy way is to flip a card and move to that spot. But for students too advanced for that, challenge them to build a complete 4/4 measure before they move at all! There is some strategy involved in it!
Four-Four Foxes Gameplay
The gameplay is a simple, Candyland-type gameplay where students draw a card, identify the note, and move forward–unless, of course, they get a specialty card, in which they could move forward or backward!
We know students are going to love it!
See how it’s played in our video…
A complete breakdown of what you get in the music game download
A step-by-step tutorial for how to play the game
A few teaching tips and suggestions
Don’t see the video above? Watch How to Play Four-Four Foxes on YouTube here.
Here’s what you’ll get with the Four-Four Foxes download:
Four-Four Foxes game in US Letter size and A4 size
Four-Four Foxes game board with notes
59 note and specialty cards
8 fox game pieces
Four-Four Foxes success poster
Four-Four Foxes activity sheet in US Letter size and A4 size
Print release
Bonus Four-Four Foxes group game board (poster sized and A3 size)
In addition to the Four-Four Foxes printable game, we have launched four Boom™ Cards (digital music theory games) that you can get to review rhythm in a different way.
See a preview of all four digital music games in this video (don’t see the video below, watch it here).
You can get our Music Game Club Boom™ Cards each month with the Boom™ Cards membership at $9/month.
Or, save and get boththe printable game and 4 Boom Cards with our top membership tier for just $15/month.
If you’ve been looking for easy ways to teach music intervals, we’ve got you.
These ten ideas are not only super simple to incorporate in any lesson, they also cover a variety of levels.
1. Have Students Move with Intervals.
This is a great ear-training exercise that introduces your students to intervals, even if they don’t read music yet.
Play an interval and ask the student to take a step across the room the size of the sound.
Does it sound squished together (2nd)? Take a baby step.
Does it sound far apart (8th)? Take a GIANT step!
Once they move, you can tell them, “That’s a 3rd” to help prepare them for learning to identify music intervals.
2. Teach Students to Identify Intervals on the Piano.
All a student needs to know is simple counting!
Give student a starting key and say, “Now, we’ll play a second above!”
Count the starting key and one key above (“1-2”) and you have your second (you could also count the letter names used).
Ask them to find more seconds on the piano. Then, move to other intervals.
For fun, you can use stickers, little animals, erasers, etc. to place on the keyboard at each interval.
add to your Pinterest teaching board
3. Focus on One Music Interval a Week.
Have a studio-wide interval challenge that is appropriate for preschoolers to highschoolers.
For example, if you’re having a “Third Interval Week,” you can teach your preschool students how to find thirds on the keyboard.
Your elementary students can learn thirds on the staff.
Your intermediate students can find thirds in their music.
4. Teach Students How to Count Intervals on the Staff.
There is no reason for intervals to be hard!
All a student has to do is count the bottom note, every line or space in between the notes, and the top note.
It may be helpful to have larger printed intervals so you can use a pencil to point to each line and space.
You can also name the notes and count the letters used (C-F has C, D, E, F which is four letter names, or a fourth).
5. Have Students Write Their Own Intervals.
This makes for fun whiteboard time! (don’t have a whiteboard? Simply slip a sheet of staff paper inside a page protector and use a dry-erase marker. Or, you can just use pencil on regular staff paper)
Give the student a starting bottom note and direct them to write intervals above.
Once the student is confident in this, you can have them write intervals below your given note.
6. Teach the Difference Between Harmonic and Melodic Intervals.
This is one of the easiest interval concepts.
The interval is the exact same (C-E is always a third) but they can be played together (harmonic) or separately (melodic).
I like to tell my students to remember that “melodic” is like a melody where you sing two separate notes.
“Harmonic” is if two people were to sing together (or harmonize).
You can have your students write the same interval in both forms.
7. Teach Music Intervals by Having Students Find Intervals in Music.
Even if a student doesn’t understand melodic and harmonic intervals, they can still find intervals in the music they’re playing.
However, covering melodic and harmonic intervals first will enable them to find even more intervals in their music!
You can either point to an interval and quiz them (“What is this interval?”), ask them to find a specific interval (“Where is a fourth?” or “Where is a melodic fourth?”), or ask them to point to any interval and identify it.
8. Do Intervallic Ear Training.
Give your students the tools to learn to hear basic intervals by linking intervals with different songs.
Give your student just one interval to create some improvisation with.
For example: open fifths played high on the piano sounds like Christmas!
Seconds played low can sound like a giant stomping around.
What other sounds do intervals make?
Remember to encourage your student to use both harmonic and melodic intervals.
10. Use Interval Flashcards.
If you want to strengthen your student’s visual recognition of intervals, flash cards is an easy way to do it! Of course, we prefer a game to flashcards because it’s the same concept, but loads more fun!
Icy Intervals: An Easy Way to Teach Music Intervals
Upgrade from flashcards with this wintery fun music theory game!
Each student gets an intervals card (with 4 intervals) then they roll a die and travel around the board to claim that interval.
The first player to claim all four intervals wins!
You can easily play this with 2-8 students.
In Icy Intervals, students will learn how to identify various intervals in treble and bass clef and race to claim the correct interval on the board.
There are three focal points on the cards, to play with students of various levels:
C position intervals (Cards 1-3)
G position intervals (Cards 4-6)
Various position intervals (Cards 7-15)
Here’s what you’ll get with the Icy Intervals music game download:
Icy Intervals game in 2 sizes: US letter & A4
Icy Intervals game board
Bonus: Icy Intervals group game board (poster sized and A3)
15 intervals cards (3 in C position, 3 in G position, 9 in various positions)
8 penguin game pieces
30 fish tokens
Icy Intervals success poster
Icy Intervals activity sheet in 2 sizes: US Letter & A4
There are 8 penguin game pieces, so you can play Icy Intervals with up to 8 players. Plus, you automatically get a bonus poster-sized board so it’s easier for them to crowd around the game board.
Icy Intervals Music Game Success Poster
We believe celebrating music theory game wins with a success poster will build student rapport!
The students have a goal to work toward (taking a picture with the success poster) and you can send the picture to the parents as a way to showcase what their child has achieved during lessons.
It’s a win-win!
These also give you great material for social media posts (be sure to tag @musicgameclub so we can celebrate with your kiddos!).
Icy Intervals Music Theory Activity Sheet
Once the student has completed Icy Intervals music theory game, you can further help them solidify their music theory knowledge with the activity sheet.
Students are given five intervals in both treble and bass clef and have to draw a line to the correct answer. Then, they can color the cute penguins.
This is a great send-home activity to reinforce the theory concepts after your students have played the game.
Want Icy Intervals music game to help music intervals in piano lessons?
Icy Intervals, our December 2023 music theory game, is just a taste of what you’ll get when you sign up for Music Game Club!
You’ll always receive:
A monthly music game (formatted in 2 sizes: US Letter and A4)
Exclusive Music Game Club membership emails
Video tutorials
Themed success posters to go with the monthly game
Bonus activity review sheet
The membership is only $15/month and you did read all of the above correctly.
You’ll receive a wealth of resources that can elevate your teaching experience and keep student morale high all year.
You’ll maintain the energy and enthusiasm throughout the entire year, ensuring a consistent and engaging experience.
Your students will start asking for their new game each month and be excited to learn new music theory concepts!
There can be so much confusion for our students when we are teaching repeat signs, D.C. al Fine, and music score markings!
First, they might forget to follow the repeat sign.
Then, they get confused about first and second endings.
Finally, they whiz right past any mentions of D.C. al Fine or use D.S. al Fine to restart the entire piece.
It’s a lot to teach and a lot to learn.
In fact, you might even be a teacher out there who lacks confidence in teaching repeat signs, D.C. al Fine, and music score markings.
If so, absolutely no shame here!
In this article, I will walk through all of the main technical signs you’ll see in music scores and what they mean.
And if you’re well-versed in all of the music scores markings but you want an easy and fun way to teach them to your students, then scroll down to learn about Scarecrow Scores–I can guarantee you, you haven’t found an easier way to teach all the tricky score markings!
Your Guide to Teaching Repeat Signs, D.C. al Fine, and Music Score Markings: A Glossary
1st ending – play this portion of music only on the first play through. Repeat back to the beginning of the piece or the forward-facing repeat sign
2nd ending – skip the 1st ending (do not replay it) and play the 2nd ending. Sometimes this has a repeat, in which you will repeat back to the beginning of the piece or the forward-facing repeat sign
3rd ending – skip and 1st and 2nd endings (do not replay them) and play the 3rd ending.
8va – octave above (octave = 8 notes)
This sign can also be placed underneath the staff to indicate playing an octave below.
8vb – octave below
15ma – two octave higher
This sign can also be placed underneath the staff to indicate playing two octave below.
15mb – 2 octaves below
Bar line / bar – a vertical line that divides the staff into measures
Dal Segno – Italian meaning “from the sign.” You will return to the fancy S symbol.
D.C. al Coda – means “from head to tail.” The Coda is an added ending. You will return to the beginning of the piece, play until you see a “to coda” text, and jump to the coda.
D.C. al Fine – Italian for “da capo al fine.” It means “from head to finish.” You will return to the beginning of the piece and play until the “fine” marking.
D.S. al Coda – “from the sign to the tail.” The Coda is an added ending. You will return to the S sign, play until you see a “to coda” text, and jump to the coda.
D.S. al Fine – “from the sign to the finish.” You will return to the fancy S (Segno) and play until you reach the “fine” marking.
Fermata – a pause (usually at least 1.5x the note value)
Fine – the end (finish!)
Repeat sign – a double bar line with two dots per staff that indicates to return to either the beginning of the piece or a forward-facing repeat sign
To Coda – when you see this sign, you will skip to the “coda,” which is an added ending.
Now that you have a general working understanding of the terms, let’s review it in action!
A Music Game to Help in Teaching Repeat Signs, D.C. al Fine, and Music Score Markings
We are proud of our first-ever music score game!
This is the most practical, hands-on game that we have created to date, and we know your students will feel confident in reading scores after they play it.
A music staff is nestled in the middle of a cozy fall garden with pumpkins, radishes, and a friendly scarecrow.
Like any music staff, this one is “read” from the beginning to end.
Your students will roll a die and move forward based on the number they roll.
But! That’s only the beginning.
You can customize the game board with repeat signs, D.C. al fine, and music score markings for the exact concepts your students need!
This music theory game can be played in countless ways:
Easy: play with the original game board for very beginning students who need to learn how to follow a basic music score
Medium: add level 1 cards (repeats, 8va, etc.) for easy adaptations to the score.
Hard: add level 2 cards (1st and 2nd endings, codas, segnos, etc.) for even more common score adaptations.
Here’s what you’ll get with the Scarecrow Scores music game download:
Scarecrow Scores game in 2 sizes: US letter & A4
Scarecrow scores game board
Level 1 and Level 2 measure cards
8 crow game pieces
Scarecrow Scores success poster
Scarecrow Scores activity sheet in 2 sizes: US Letter & A4
Print release
Not included but needed: 1 die
Level 1 cards:
Backward and forward repeat signs
Fermata
8va, 8vb, 15ma, 15mb (for one hand, both hands, on repeat, etc.)
Level 2 cards
1st, 2nd, 3rd endings
D.C. al Coda, D.C. al fine, D.S. al Coda, D.S. al fine
There are 8 crow game pieces, so you can easily play Scarecrow Scores with up to 8 players.
Each player must navigate through the score and whoever reaches the final bar line first wins.
To make gameplay slightly faster, give each player their own die and have them roll at the same time.
This is a great game to play with group lessons because your students will make SURE that their opponents are following all the markings of the score and going backward as needed!
Scarecrow Scores is easily played with 2 students or 8.
Scarecrow Scores Music Game Success Poster
We believe celebrating music theory game wins with a success poster will build student rapport!
The students have a goal to work toward (taking a picture with the success poster) and you can send the picture to the parents as a way to showcase what their child has achieved during lessons.
It’s a win-win!
These also give you great material for social media posts (be sure to tag @musicgameclub so we can celebrate with your kiddos!).
Scarecrow Scores Music Theory Activity Sheet
Once the student has completed Scarecrow Scores music game, you can further help them solidify their music theory knowledge with the activity sheet.
Students have special terms to identify and draw a line to the correct answer. Plus, there are fun crows to color!
This is a great send-home activity to reinforce the theory concepts after your students have played the game.
Want Scarecrow Scores music game to help in teaching repeat signs, D.C. al Fine, and Music Score Markings?
When you’re ready to teach flats in music, there are a lot of fun tricks and approaches you can use, and today I’m going to cover 4 ways you can do it.
I personally like to teach flats in music as early as possible.
As soon as my student has a good grasp of the white piano keys, I start introducing them to sharps and flats.
Then, of course, as the student progresses, they go from learning flats on the piano keys to flats in music and, finally, in key signatures.
Here are 4 ways I teach flats in music.
1. Teaching flats on the piano keys
The very first step to teach flats in music is teaching them on the instrument.
When I first explain flats to students, I like to tell them that some notes are special and have to “borrow” a name from their friend.
On the piano, these special notes are usually the black keys (which also have two names, but I tell them that later, when I introduce sharps).
When you hear or see that a note is “flat,” it means to “go down a half step/semitone” (this helps the student with musical direction).
The best (and funniest) way for a student to remember this is to think “What would you do if you sat on a flat ball? Go down!”
Older students can think of a flat tire.
Once a student understands the direction of flats, I start teaching them to identify flat keys on the piano.
They start with the white key then “make it flat” and go down a half step (semitone) to the next key (e.g. “Find a B. Now where is B-flat?”).
Usually for the first week or two, I have students find the white key and then the flat key.
Once they understand the association between those notes, then I remove the first step (white key) and have them find just the flatted key (e.g. “Find B-flat, E-flat, etc.”).
2. Teach flats in music
Once a student understands how flats work on the piano, it’s usually pretty easy to teach them flats in music.
All you have to do is now explain, “You know the flat we’ve been talking about? This is the flat symbol!”
If you have a student who can’t seem to be getting their flats correct, make sure they’re identifying the correct part of the symbol (looking at the loop, not the stick).
3. How to teach the order of flats
There are several ways to teach the order of flats to students–and a lot of it depends on how their mind works.
Some students do well at memorizing the order of sharps (F-C-G-D-A-E-B) and reversing it for flats (B-E-A-D-G-C-F).
Others (like me) just remember BEAD Greatest-Common-Factor.
One that my classmates loved in college was BEAD Greasy-Cheese-Fries.
Young students might appreciate BEAD Go-Catch-Fish.
If your student relies heavily on mnemonics, you can use Battle Ends And Down Goes Charles Father or Before Eating A Donut Get Coffee First.
Or, you can ask your student to come up with their own mnemonics for the order of flats (if they create it, they’ll likely remember it better!).
4. How to teach flat key signatures
I love teaching students how to identify flat key signatures.
They’re so easy!
First, you just have to memorize that one flat = F major.
From there, find the second-to-last flat, and you’ve got the major key signature.
For example:
Flats B-E-A is the key of E-flat major
Flats B-E-A-D-G is the key of D-flat major
Be sure your student knows to always say the flat, because B major isn’t the same as B-flat major!
A Flat Music Game to Teach Flats in Music
You know us–if we can make a game of a musical concept, we will!
Whatever level your student is at: whether they’re just learning flats on the piano keys, the music staff, or the key signatures, we have a music theory game for them to review and solidify their flats.
Immerse yourself in the serene and captivating world of Flamingo Flats, a unique music theory game that blends strategy, nature, and original melodies.
Set in a lush flamingo habitat with marshes and beach, this game is a captivating twist on the classic checkers game, inviting players of all ages to engage in a delightful symphony of strategy and music.
Flamingos go against shrimp to see who can get to the other side with the most pieces first.
What is Flamingo Flats Music Theory Game?
In Flamingo Flats, students will learn how to identify flats in music as they study the musical excerpts in order to move forward on the board.
Flamingo Flats can be played by any age student who needs to brush up on their flat identification.
This music theory game can be played in two different ways:
Easy: students count the flats in the key signature
Hard: students identify which notes in the musical excerpt are affected by the flat key signature
Here’s what you’ll get with the Flamingo Flats music game download:
Flamingo Flats game in 2 sizes: US letter and A4
Flamingo Flats game board
33 sight-reading cards in flat keys
4 flamingo game pieces
4 shrimp game pieces
Flamingo Flats success poster
Flamingo Flats activity sheet in 2 sizes: US Letter and A4
Print release
Bonus Flamingo Flats group game board in 2 sizes (18 x 24” and A3)
While this looks like a checkers game, the movement is slightly different but just as easy.
Students identify how many notes should be flat on the sight-reading cards and move forward accordingly (e.g. 2 notes flat = 2 moves, 4 notes flat = 4 moves).
The flamingo and shrimp game pieces can move forward, sideways, and backwards.
And, of course, can jump the opponent if desired.
Whoever can get all their game pieces to the other side first wins!
See how it’s played in the video!
A complete breakdown of what you get in the music game download
There are 8 total game pieces (4 flamingos, 4 shrimp), so you can play Flamingo Flats with up to 8 players–it will just require a lot of teamwork!
Each team works together to move their game pieces across the board–and what’s fun and strategic is that they can move any of their team’s pieces!
We provide a bonus poster-sized game board option that you can bring to your local print shop and get a larger board for students to crowd around.
Flamingo Flats is easily played with 2 students or 8.
Flamingo Flats Music Game Success Poster
We believe celebrating music theory game wins with a success poster will build student rapport!
The students have a goal to work toward (taking a picture with the success poster) and you can send the picture to the parents as a way to showcase what their child has achieved during lessons.
It’s a win-win!
These also give you great material for social media posts (be sure to tag @musicgameclub so we can celebrate with your students!).
Flamingo Flats Music Theory Activity Sheet
Once the student has completed Flamingo Flats music theory game, you can further help them solidify their music theory knowledge with the activity sheet.
Students will trace then draw their own flats for three key signatures: F, B-flat, and E-flat.
This is a great send-home activity to reinforce the theory concepts after your students have played the game.
Want Flamingo Flats music game to help teach flats in music?
What are your favorite methods in teaching flats to music students?
Comment and share your best tips!
Need another game that goes above and beyond Flamingo Flats?
If your students have already mastered their flats and are ready for more, check out Froggy Fifths, our Circle of Fifths game that teaches all the sharps and flats in the Circle of Fifths.